Podscribe Ad Destination
Learn how to quickly set up the Podscribe destination by entering your advertiser ID and configuring event mappings via the UI.
Podscribe Destination Setup Guide
This guide will walk you through setting up the Podscribe destination. Podscribe is a podcast advertising attribution platform. You can send conversion data to Podscribe from the events that already exist in your Ours Privacy account.
Step 1: Add the Podscribe Destination
- Navigate to the Destinations section in your platform.
- Search for Podscribe in the list of available destinations.
- Click Add Destination to include Podscribe in your active destinations.
Step 2: Enter Your Advertiser ID
- In the Podscribe destination settings, locate the Advertiser ID field.
- Retrieve your Advertiser ID from your Podscribe account (found under the "Pixel Configuration" section).
- Enter the ID in the field provided and click Save.
Step 3: Configure Event Mappings
The default mapper is preconfigured to handle typical events such as visits, sign ups, leads and purchases. You can customize these mappings to fit your specific needs directly through the UI.
Please ensure that in the Podscribe dashboard you have enabled all the actions to track that you plan to send to Podscribe from Ours Privacy.

How to Customize Mappings:
- Open the Mapper Configuration section for Podscribe.
- Review the default fields such as:
- Action: Define the type of event (e.g.,
view,signup,purchase). - IP Address: Ensure the visitor’s IP address is mapped correctly per your organization's policies.
- User Agent: Map the visitor’s user agent string.
- Timestamp: Ensure accurate event timestamps are included.
- Additional Properties: Customize fields like
email,order number,value, andcurrency.
- Action: Define the type of event (e.g.,
- Use the provided UI tools to:
- Set or modify mappings for each field.
- Add fallback values for missing data.
- Apply modifications (e.g., masking IP addresses or setting fake IPs).
- Save your changes to apply the customizations.
Step 4: Allow Events
Once the mappings are configured, ensure that events are enabled for the Podscribe destination:
- Navigate to the Allowed Events section within the destination settings.
- Select which events you want to send to Podscribe.
- Save your settings.
Step 5: Validate the Setup
After completing the configuration:
- Test a few events to ensure data is being sent correctly.
- Check the Podscribe dashboard to verify that the events are appearing as expected.
- Adjust mappings if any data appears misaligned.
FAQs
How do I handle sensitive data like IP addresses?
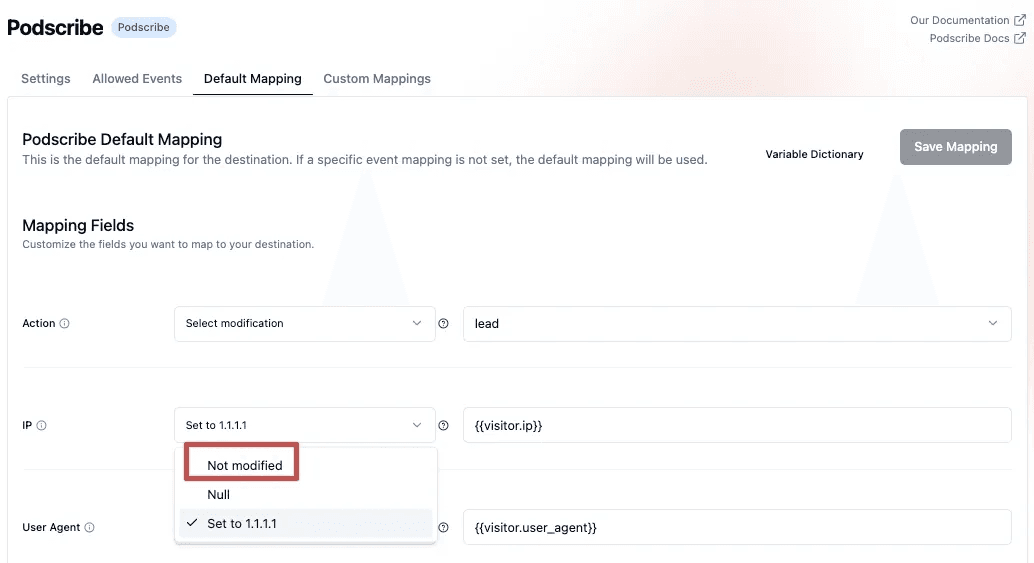
Podscribe recommends mapping the real, Not modified IP address to ensure accurate conversion tracking. By default, Ours Privacy sets the IP address to a placeholder value (e.g., 1.1.1.1) in order to comply with HIPAA and other privacy requirements. However, this placeholder prevents Podscribe from registering conversions.
-
Recommendation: In the Default Mapping configuration, set the
IP Addressfield to Not modified to send the user's actual IP address.
⚠️ Before enabling this, make sure your organization has the appropriate legal agreements in place with Podscribe, such as a Business Associate Agreement (BAA) or equivalent.
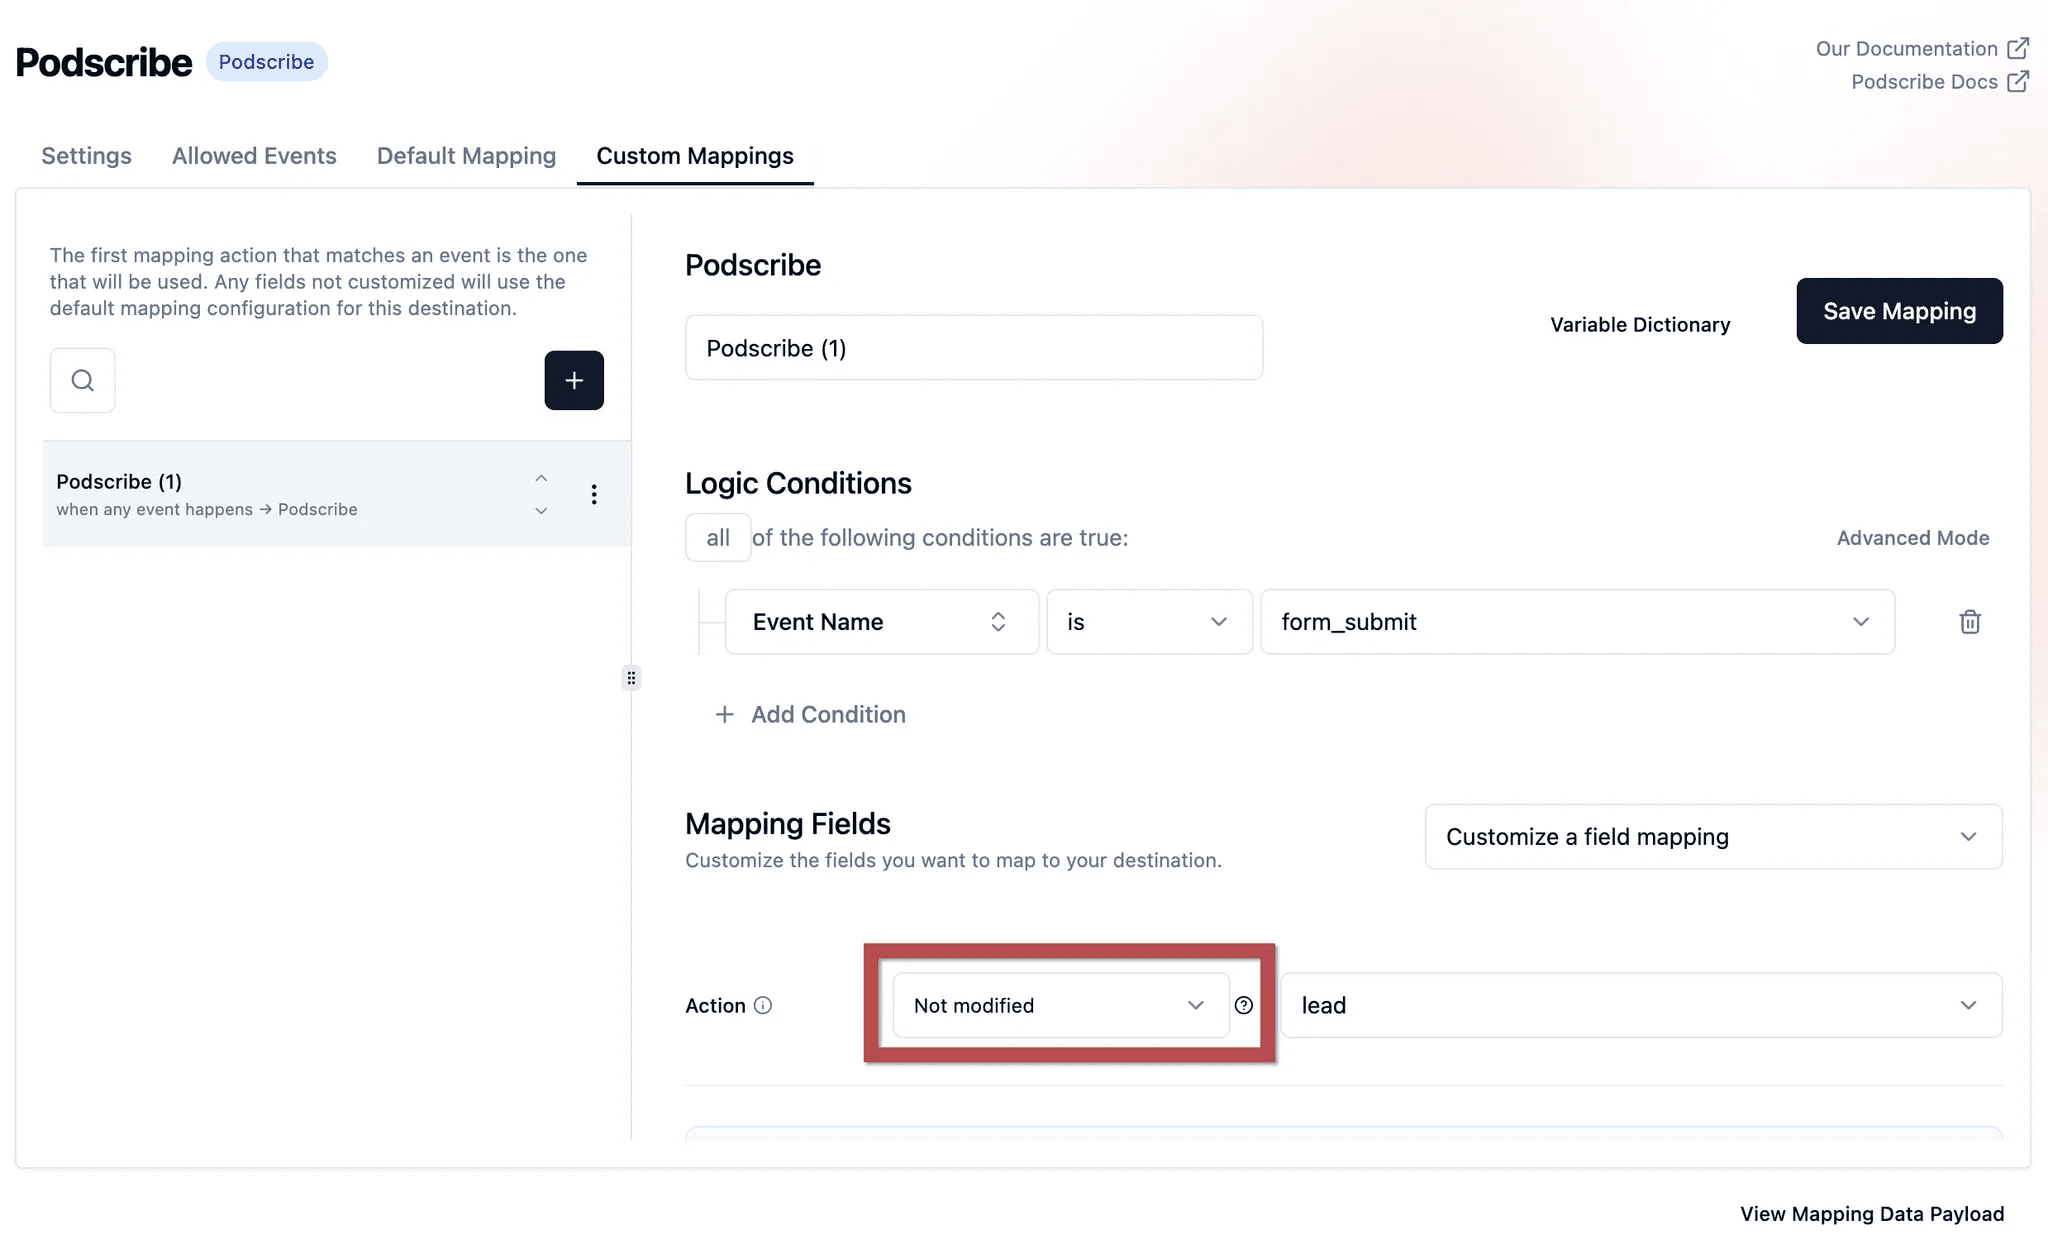
Additionally, in Custom Mappings, the action field for each allowed event is often hashed by default, which can prevent Podscribe from recognizing and attributing the event correctly.
- Recommendation: For all allowed events, set the
actionfield to Not modified to ensure Podscribe receives the original event name (e.g.,signup,purchase,view).

What happens if I don’t map a required field?
Unmapped fields will fall back to the default value or be omitted if no fallback is provided.
Can I create custom events?
Yes, you can define custom events by adding them to the allowed events and mapping them in the configuration.
How is this guide?